Required Equipment
Inspectors must bring:
- Ladder (roof-safe access)
- Chalk (for roof marking)
- Tape measure
- Hover app (required)
- Drone (if available)
Roof Claim Inspection Overview
Each order will specify whether an Exterior Only or an Interior & Exterior inspection is required. Inspectors must follow the inspection type listed on the order.
For exterior-only inspections, the scope includes:
- Roof condition
- Damage documentation
- Measurement capture (if applicable)
Inspectors must:
- Walk the entire roof unless unsafe conditions prevent access
- Document each damage point clearly
- Use chalk to mark roof damage when possible
Hover App Requirements Overview
Inspectors must use the Hover app to scan the exterior of the property.
Scan typically takes ~10 minutes and requires ~8 photos.
Scan Process
The client creates and assigns the job in Hover when the order is placed.
Inspectors must ensure they are scanning the assigned job, not creating a new one.
Hover Troubleshooting
Job Not Visible in App/ Unable to Access App
Please contact Inspectify for further assistance by emailing hello@inspectify.com or texting (855) 271-6876.Roof Marking Requirements
Inspectors must mark roof damage using chalk whenever possible.
If Chalk Cannot Be Used
- Mark damage digitally on photos instead
Hover Scanning Best Practices for Inspectors
Use the following Hover help articles when needed:
Corner Photo Best Practices
To improve scan accuracy and reduce the likelihood of a failed scan or revisit:
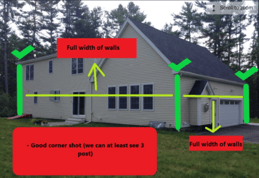
- Stand as far back from the corner of the property as possible.
- Position yourself at each corner of the structure.
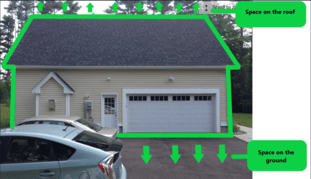
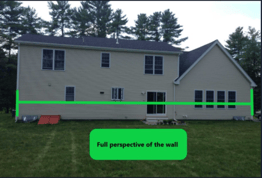
- Capture as much of the home as possible in each photo.
- Include plenty of both ground and sky in the image.
- Ensure the entire corner of the home is visible and avoid cropping the roofline or lower portion of the structure.
Inspection Requirements
- Complete a full roof walk when safe to do so
- Capture clear, well-lit photos of all damage points
- Ensure the correct Hover job is selected before scanning
- Do not create duplicate scans under any circumstance
Common Mistakes
- Creating new Hover jobs instead of using assigned job
- Missing roof areas during walkthrough
- Not marking damage points
- Submitting incomplete scans
Steps To Using Hover App
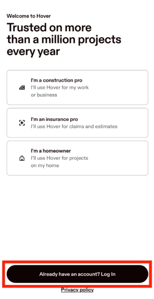
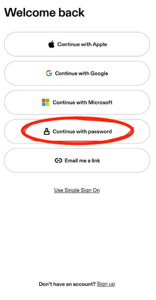
Select “Already have an account? Log In" and "Continue with password" when signing in.
Note: Log in using the Inspectify credentials provided.
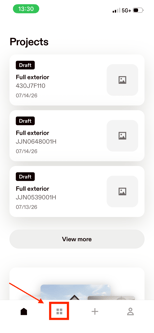
Fom the Home  Page click the menu grid shown below.
Next scroll over to the Photos Needed tab.
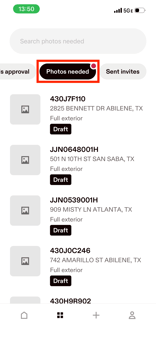
In the search bar, enter the property address associated with the required scan.
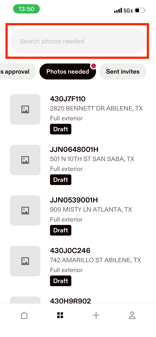
Once the correct property is selected, click Start Scan.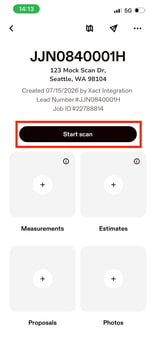
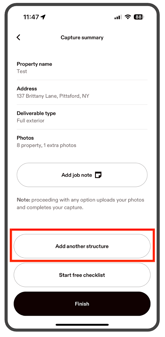
If the property has additional structures (e.g., a detached garage, guest house, or shed), click "Add Another Structure" to scan each structure separately.